
Node.js and Express have become essential tools in building scalable APIs, which are crucial for maintaining high performance and ensuring seamless user experiences. With its event-driven architecture, Node.js is highly efficient in managing the growing demands for real-time applications, making it a top choice for backend development. A study found that 68% of developers reported increased productivity with Node.js, largely due to its capability to use JavaScript on both the client and server sides, thus simplifying the development process. In this blog, we’ll provide a step-by-step guide with precise code examples to help you build scalable APIs using Node.js and Express.
Key Principles for Building Scalable APIs
Node.js is inherently asynchronous, allowing it to handle multiple requests simultaneously without blocking the event loop. This feature is crucial for scalability, enabling efficient resource management, particularly under high-load conditions.
Adopting a modular approach is essential. By breaking down the application into smaller, self-contained modules, developers can manage complexity and facilitate independent scaling. Each module should focus on a specific functionality, which allows for easier testing, maintenance, and scaling of individual components as needed.
Utilizing a microservices architecture can significantly enhance scalability. This approach allows different parts of the application to be scaled independently, optimizing resource use and improving overall performance. Each microservice can be developed, deployed, and scaled without affecting other services.
Express.js simplifies the creation of routes and the integration of middleware. Middleware functions can handle tasks such as authentication, logging, and error handling, making the API more robust and easier to manage. Properly organizing routes and controllers is vital for maintaining clarity and efficiency in the codebase.
Implementing comprehensive error handling and logging mechanisms is crucial for maintaining API stability. This ensures that issues can be quickly identified and resolved, minimizing downtime and enhancing user experience.
Using tools like Swagger for API documentation is recommended. Well-documented APIs not only facilitate easier onboarding for new developers but also ensure that the API is user-friendly for consumers, enabling better integration and usage.
Optimizing code for performance is critical. Techniques include minimizing synchronous operations, managing resource consumption, and leveraging caching strategies (e.g., using Redis) to reduce database load and improve response times.
Regular load testing is essential to identify potential bottlenecks and ensure the API can handle anticipated traffic spikes. Monitoring key metrics such as response times and error rates can guide necessary adjustments and scaling strategies.
Build Fast, Scalable APIs with Our Expert Team
Partner with ViitorCloud to drive efficiency through Node.js and Express APIs.
How to Build Scalable API with Node.js and Express
1. Setup Your Project
We created a scalable-api folder. Open this folder inside your code editor.
then follow the instructions below.
To Initialize a new Node.js project run the below command.
npm init -yOnce you run the above command, your package.json file will be created inside the folder.
Now, you have to run the below command to install Express.
npm install expressOnce you run the above command, the node_modules folder & package-lock.json file will be created in the root folder.
2. Creating the Server
Now that you already installed Express, your next step is to create your server file and set up a basic Express server.
You have to create a file named app.js in the root folder.
Now, you created your file app.js and set up a basic Express server in app.js.
const express = require('express');
const app = express();
const port = process.env.PORT || 3000;

// Middleware to parse JSON bodies
app.use(express.json());

// Basic route
app.get('/', (req, res) => {
    res.send('Hello World!');
});

// Start the server
app.listen(port, () => {
    console.log(`Server is running on port ${port}`);
});
Now, once you are done, run your server by executing the following command in your terminal.
node app.jsOnce you run the above command, you’ll see the below message in your terminal
Starting the server…
Middleware set up.
Route set up.
Server is running on port 3000
And to access the server, open your Chrome browser or whichever you’re using and navigate to “http://localhost:3000”, You’ll see the “Hello World” message.
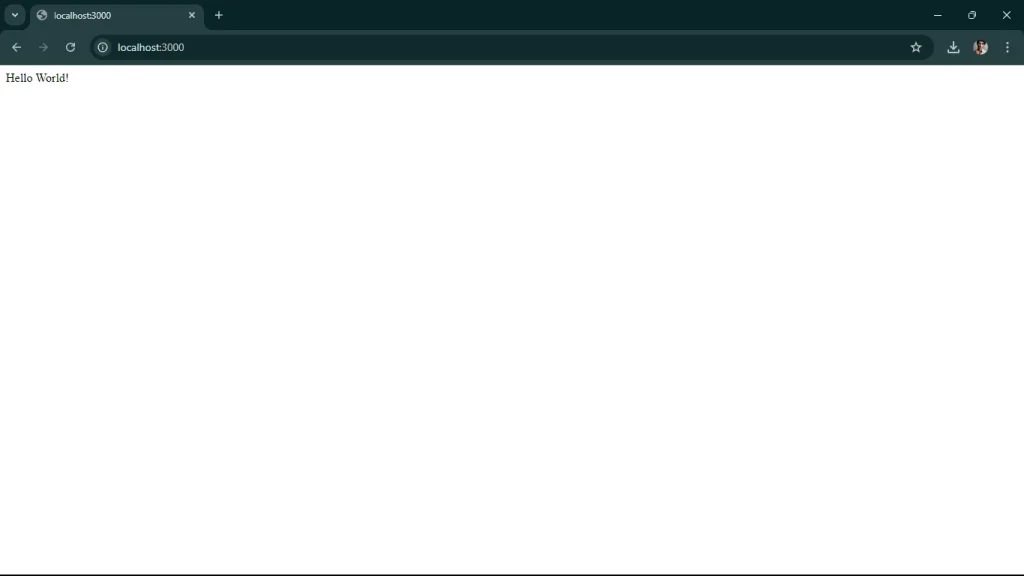
As shown in the above screen.
The next steps for building scalable APIs with Node.js and Express typically involve.
3. Defining & Adding More Routes
You have to define additional routes to handle different endpoints. For example, let’s add routes for /api and /users.
// ... existing code ...

// New route for /api
app.get('/api', (req, res) => {
    res.send('API endpoint');
});

// New route for /users
app.get('/users', (req, res) => {
    res.send('Users endpoint');
});

// ... existing code ...
You can add the above code in your app.js file and update your app.js file.
- app.get(‘/api’, (req, res) => { … }): This defines a new route that listens for GET requests on the /api endpoint. When a request is received, it sends back the response “API endpoint”.
- app.get(‘/users’, (req, res) => { … }): This defines another route that listens for GET requests on the /users endpoint. When a request is received, it sends back the response “Users endpoint”.
Now, let’s test the new routes.
start your server by running:
node app.jsNow, open your browser, and go to “http://localhost:3000/api”, you’ll see the message “API endpoint”

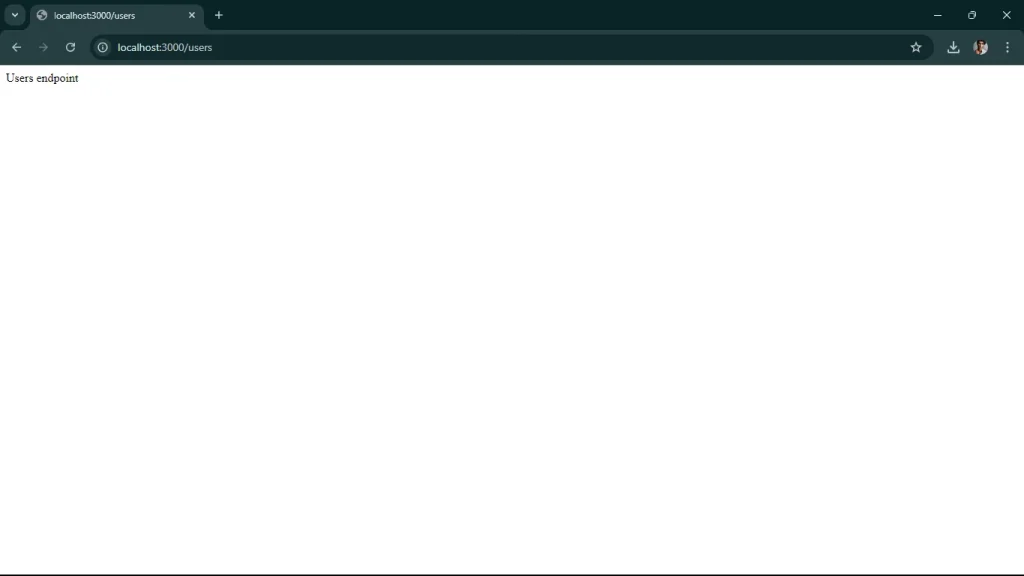
Now, you should navigate to “http://localhost:3000/users”, you’ll see the message “Users endpoint”, shown in the below screen.
Now, your next step will be to connect to a database. For this, we’ll use MongoDB with Mongoose, a popular ODM (Object Data Modeling) library for MongoDB and Node.js.
4. Connecting to a Database.
You’ve to run the following command to install the Mongoose.
npm install mongooseLet’s see how you can update your app.js file to connect to the MongoDB database.
  const mongoose = require('mongoose');

   // Connect to MongoDB
   mongoose.connect('mongodb://localhost:27017/mydatabase', { useNewUrlParser: true, useUnifiedTopology: true })
       .then(() => console.log('Connected to MongoDB'))
       .catch(err => console.error('Could not connect to MongoDB', err));

   // ... existing code ...
Connect to MongoDB: Use mongoose.connect to connect to your MongoDB database. Replace ‘mongodb://localhost:27017/mydatabase’ with your actual MongoDB connection string if it’s different.
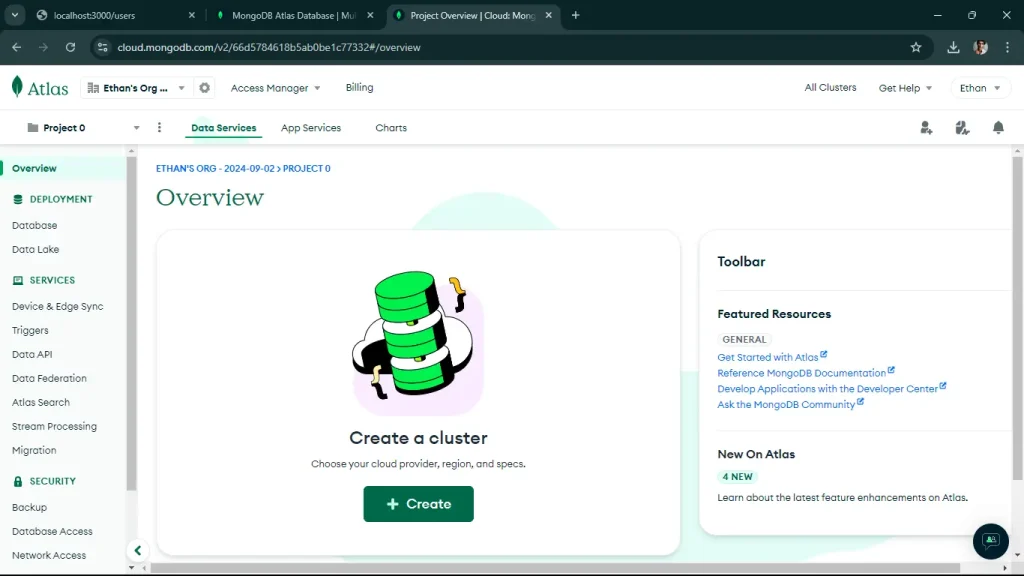
Now, for that, You must first set up your MongoDB. If you haven’t, let’s set it up now. Use MongoDB Atlas (Cloud Database). You have to create a MongoDB Atlas account, Go to MongoDB Atlas and sign up for a free account.
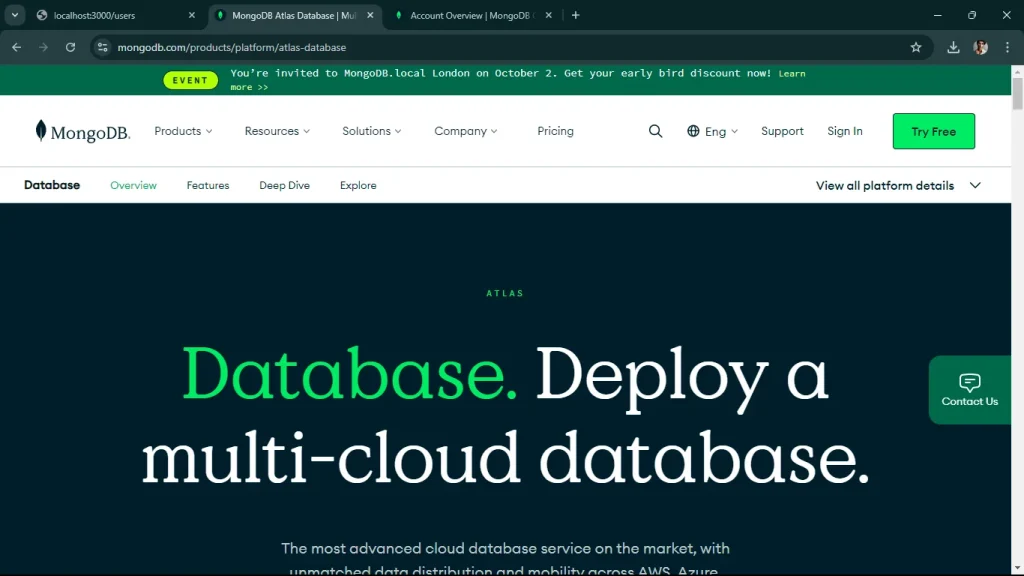
Once you sign up via Google or GitHub Account, You’ll see the below screen after login.
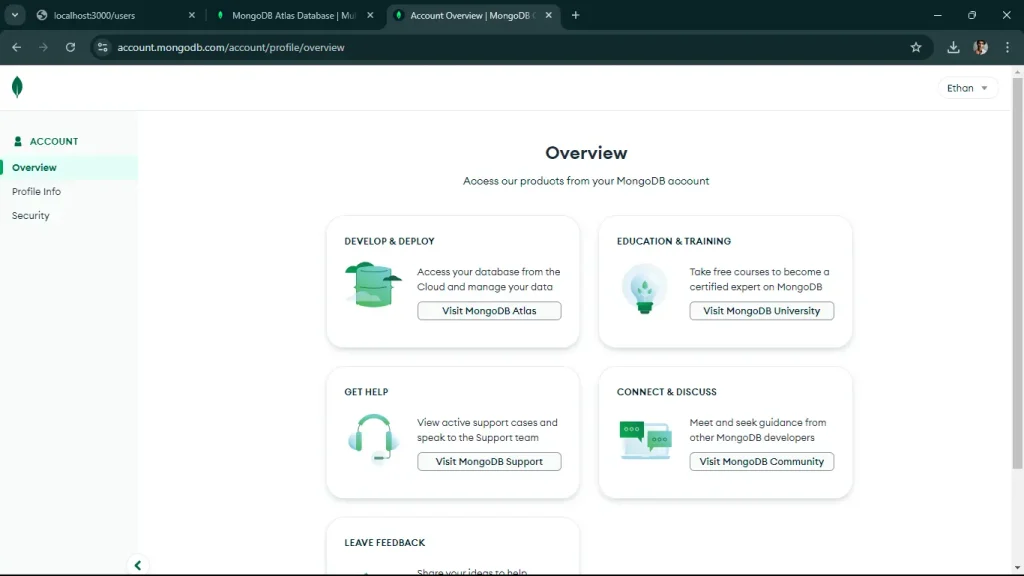
You’ll to click on Visit MongoDB Atlas, Click on Create a New Cluster.
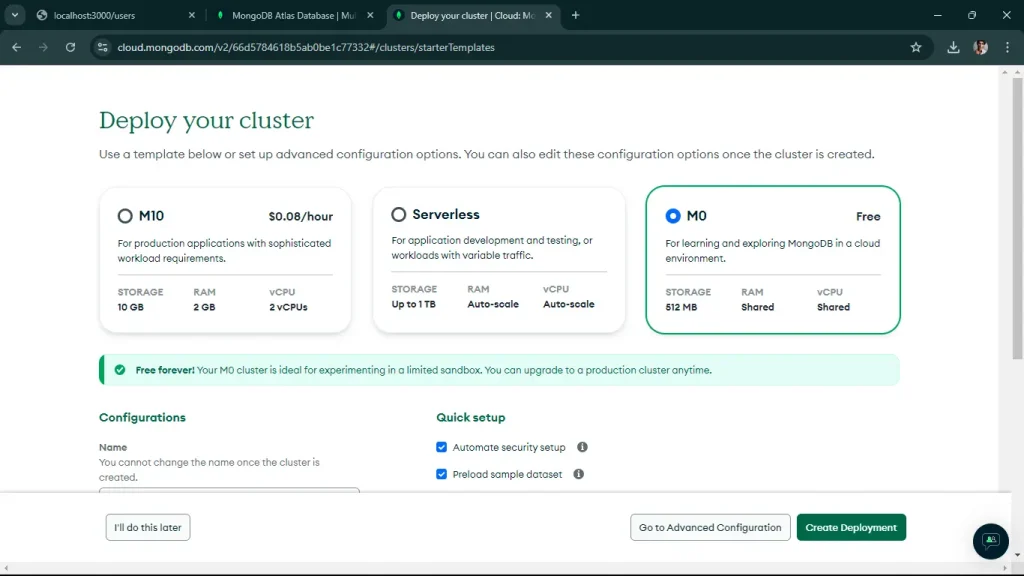
Once you click on Create as shown in the above screen, you’ll be redirected to the below screen, select M0 free version.
You have to keep your configuration as it is by default, now click on Create Deployment.
Once you click on that, you’ll come to this screen.
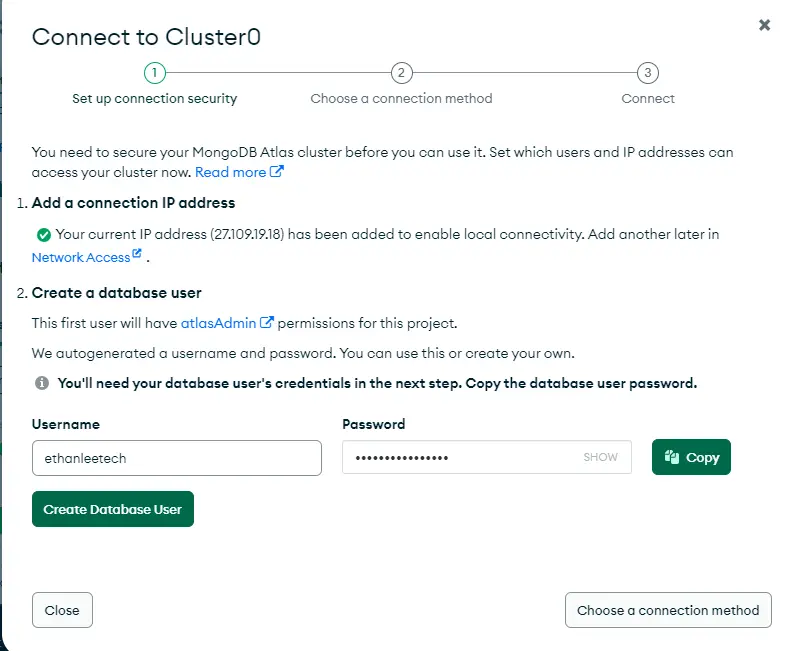
You’ve to note down, your username and password, once you click on “Create Database User”
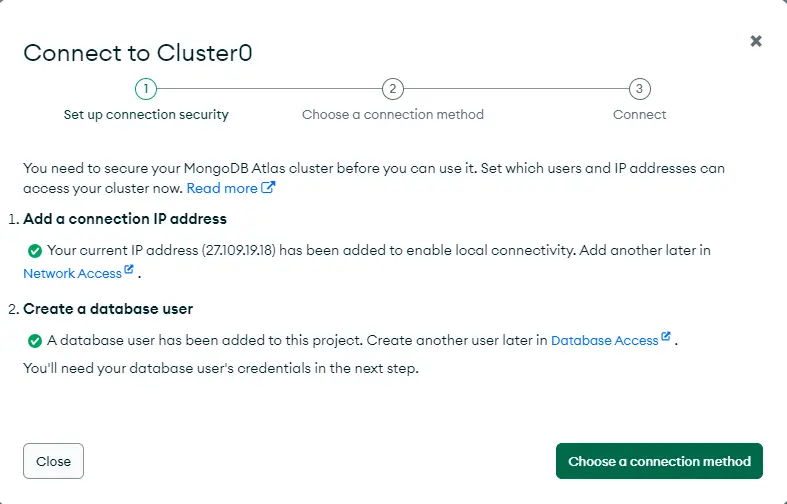
Once you click on “Choose a connection method”

Now, choose “Connect to your application”, You’ll see the screen below.
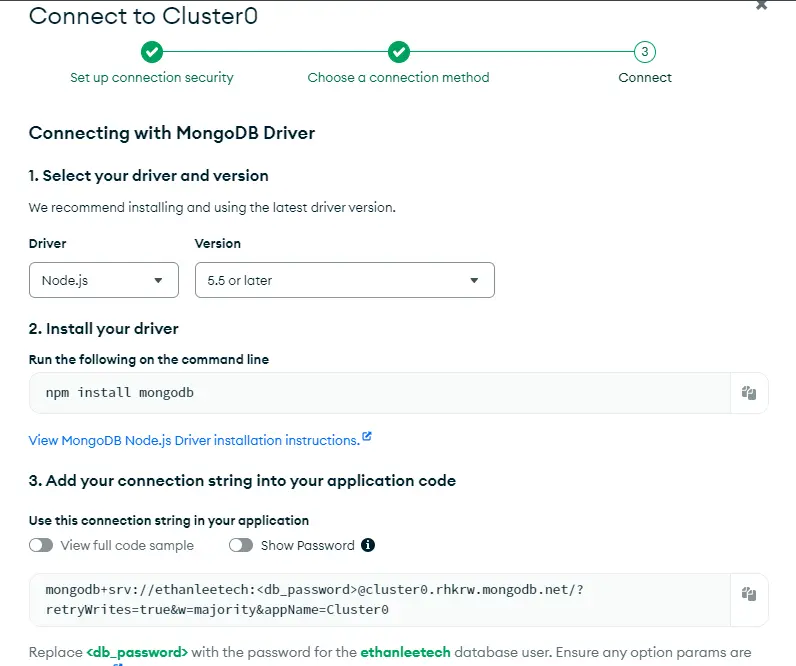
Now, you’ll see a connection string like this – mongodb+srv://:@cluster0.mongodb.net/myFirstDatabase?retryWrites=true&w=majority
replace it with your username and password you noted down earlier.
Now, you have to copy your MongoDB string and replace it in your app.js code, and you have to update it.
Now, you can run your node app.js file again in your terminal. You’ll see the message “Connected to MongoDB”

5. Implementing Middleware
So, now you see the above successful message, now, the next step is to add simple logging middleware using Morgan which is a popular HTTP request logger middleware for Node.js.
To install Morgan, run the below command.
npm install morganNow, you’ve to update your app.js file to use Morgan.
const express = require('express');
const morgan = require('morgan'); // Import morgan
const app = express();
const port = process.env.PORT || 3000;
console.log('Starting the server...');
const mongoose = require('mongoose');
// Replace with your actual MongoDB connection string
const mongoURI = 'mongodb+srv://<username>:<password>@cluster0.mongodb.net/myFirstDatabase?retryWrites=true&w=majority';
mongoose.connect(mongoURI, { useNewUrlParser: true, useUnifiedTopology: true })
.then(() => console.log('Connected to MongoDB'))
.catch(err => console.error('Could not connect to MongoDB', err));
// Middleware to parse JSON bodies
app.use(express.json());
// Use morgan for logging
app.use(morgan('tiny'));
console.log('Middleware set up.');
// Basic route
app.get('/', (req, res) => {
console.log('Received a request on /');
res.send('Hello World!');
});
// New route for /api
app.get('/api', (req, res) => {
res.send('API endpoint');
});
// New route for /users
app.get('/users', (req, res) => {
res.send('Users endpoint');
});
console.log('Route set up.');
// Start the server
app.listen(port, () => {
console.log(`Server is running on port ${port}`);
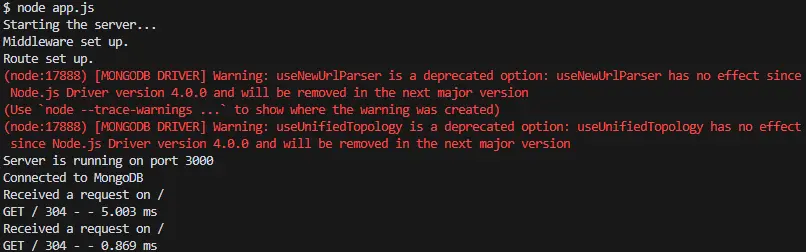
}); Now, run your node app.js, go to “http://localhost:3000/” and you’ll see a log entry for the request in the terminal. This step will add basic logging to your application.
Your next step is to define a schema and model for your MongoDB collections using Mongoose. This will allow you to interact with your database in a structured way.
6. Define a Schema and Model
You have to create a new file named user.js in a models directory you may need to create the models directory if it doesn’t exist). You’ve defined a User Schema and model for users.
  const mongoose = require('mongoose');

   // Define the User schema
   const userSchema = new mongoose.Schema({
       name: {
           type: String,
           required: true
       },
       email: {
           type: String,
           required: true,
           unique: true
       },
       password: {
           type: String,
           required: true
       }
   });

   // Create the User model
   const User = mongoose.model('User', userSchema);

   module.exports = User;
Now, you’ve to update the app.js to Use the User Model:
In app.js, import the User model and create a route to add a new user:
const express = require('express');
   const morgan = require('morgan');
   const mongoose = require('mongoose');
   const User = require('./models/user'); // Import the User model
   const app = express();
   const port = process.env.PORT || 3000;

   console.log('Starting the server...');

   // Replace with your actual MongoDB connection string
   const mongoURI = 'mongodb+srv://<username>:<password>@cluster0.mongodb.net/myFirstDatabase?retryWrites=true&w=majority';

   mongoose.connect(mongoURI, { useNewUrlParser: true, useUnifiedTopology: true })
       .then(() => console.log('Connected to MongoDB'))
       .catch(err => console.error('Could not connect to MongoDB', err));

   // Middleware to parse JSON bodies
   app.use(express.json());

   // Use morgan for logging
   app.use(morgan('tiny'));

   console.log('Middleware set up.');

   // Basic route
   app.get('/', (req, res) => {
       console.log('Received a request on /');
       res.send('Hello World!');
   });

   // New route for /api
   app.get('/api', (req, res) => {
       res.send('API endpoint');
   });

   // New route for /users
   app.get('/users', (req, res) => {
       res.send('Users endpoint');
   });

   // Route to add a new user
   app.post('/users', async (req, res) => {
       try {
           const user = new User(req.body);
           await user.save();
           res.status(201).send(user);
       } catch (error) {
           res.status(400).send(error);
       }
   });

   console.log('Route set up.');

   // Start the server
   app.listen(port, () => {
       console.log(`Server is running on port ${port}`);
   });
Now, that you’ve to open Postman, remember that you have to use the desktop Postman agent, click on a new request, select request type to “Post”, and Enter the URL – “http://localhost:3000/users” Now, select the body tab, select row, and json there.
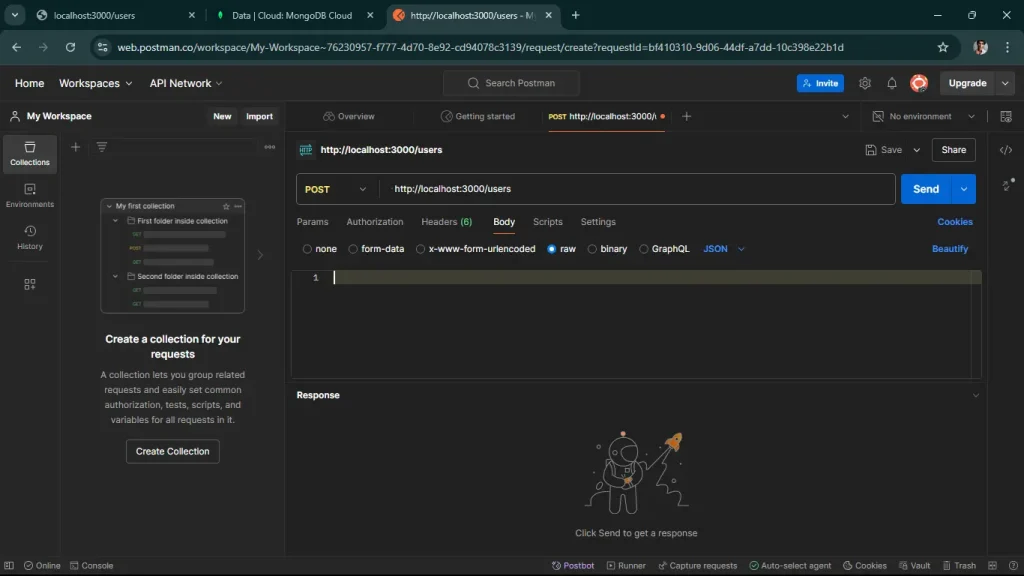
Enter the following json in the text area.
{
"name": "John Doe",
"email": "[email protected]",
"password": "password123"
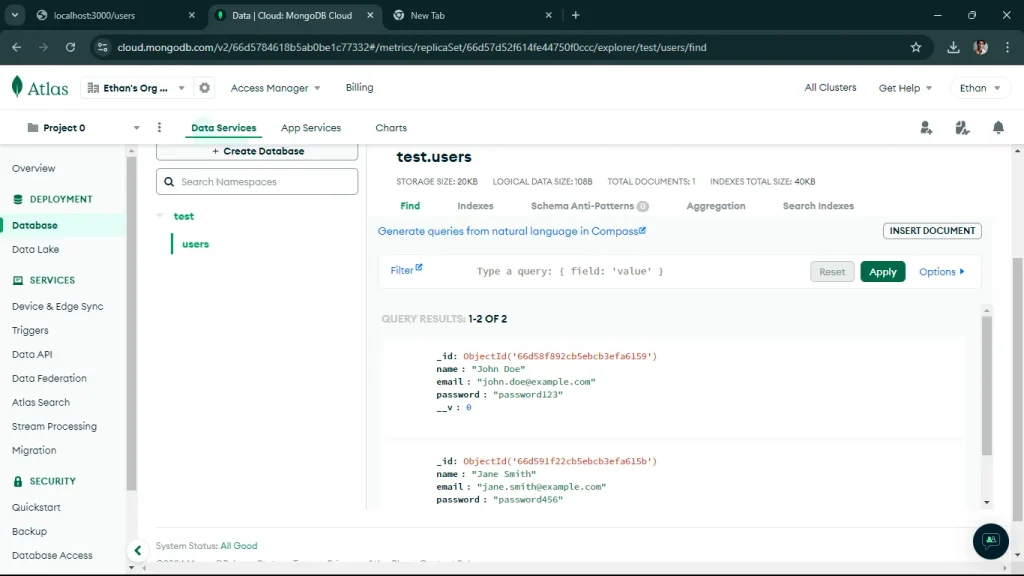
} Once you send the request, it will reflect in your MongoDB Atlas account, you must go to the database and select cluster0, find the database you’ve created, go to the user, and here you’ll find the information you send via a request. just like the screen below.
7. Implemented CRUD Operations:
As we successfully added users to your MongoDB database, the next step is to implement additional CRUD (Create, Read, Update, Delete) operations for your User model. This will allow you to manage users more effectively.
Let’s start by adding routes for reading, updating, and deleting users.
Add a route to get all users and a route to get a user by ID.
// ... existing code ...

// Route to get all users
app.get('/users', async (req, res) => {
    try {
        const users = await User.find();
        res.send(users);
    } catch (error) {
        res.status(500).send(error);
    }
});

// Route to get a user by ID
app.get('/users/:id', async (req, res) => {
    try {
        const user = await User.findById(req.params.id);
        if (!user) {
            return res.status(404).send('User not found');
        }
        res.send(user);
    } catch (error) {
        res.status(500).send(error);
    }
});

// ... existing code ...
Add a route to update a user by ID.
// ... existing code ...

// Route to update a user by ID
app.put('/users/:id', async (req, res) => {
    try {
        const user = await User.findByIdAndUpdate(req.params.id, req.body, { new: true, runValidators: true });
        if (!user) {
            return res.status(404).send('User not found');
        }
        res.send(user);
    } catch (error) {
        res.status(400).send(error);
    }
});

// ... existing code ...
Add a route to delete a user by ID.
// ... existing code ...

// Route to delete a user by ID
app.delete('/users/:id', async (req, res) => {
    try {
        const user = await User.findByIdAndDelete(req.params.id);
        if (!user) {
            return res.status(404).send('User not found');
        }
        res.send(user);
    } catch (error) {
        res.status(500).send(error);
    }
});

// ... existing code ...
once, you update the above code in your app.js file,
start your server using the node app.js command,
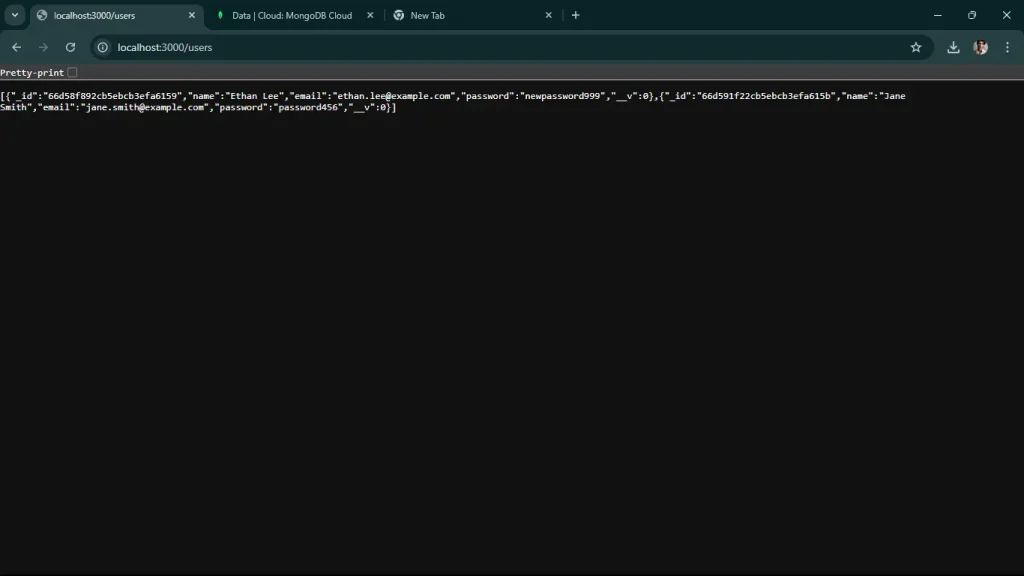
now, send a request to get all users: You’ll see the below screen, in your “http://localhost:3000/users”
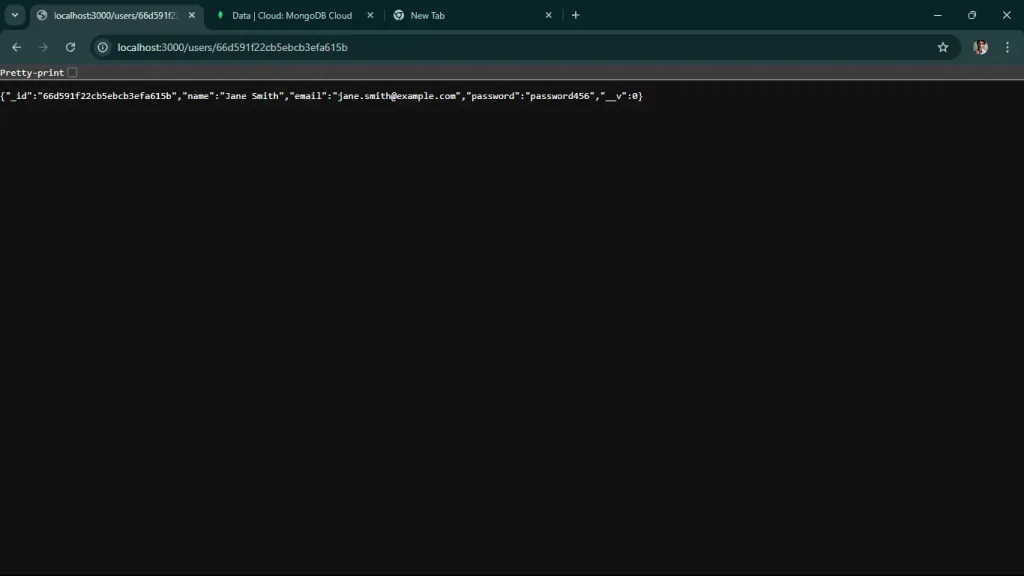
When you run get user by ID, you’ll see it in the terminal as well on the local host as well.

When you update any information, you’ll be able to see it here. we changed the name from John Doe to Ethan Lee,
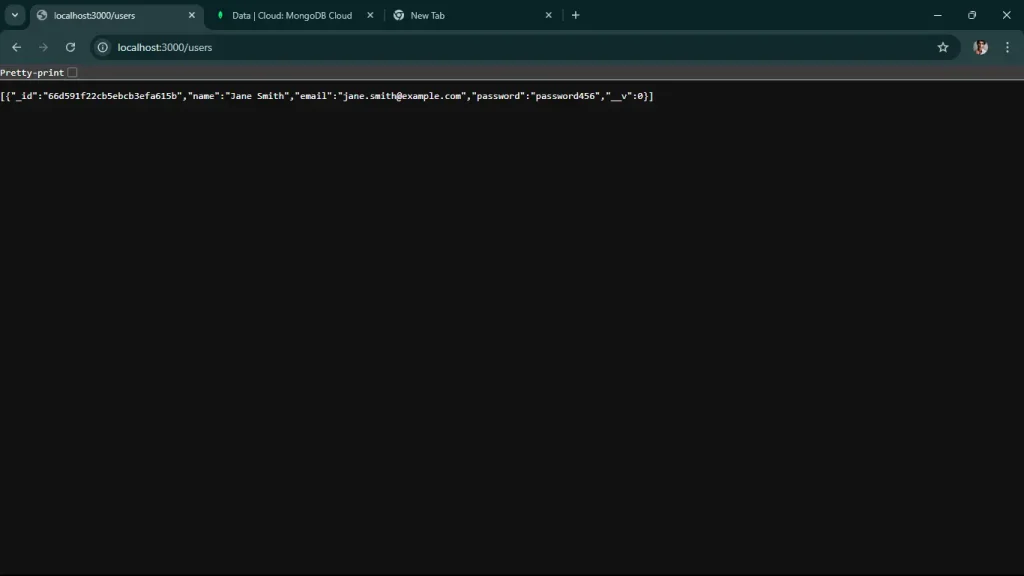
When you run a delete request, one user will be deleted.
So, we successfully implemented and tested all the basic CRUD Operations for your API.
8. Implement Error Handling Middleware
Centralized error handling helps manage errors gracefully and provides consistent error responses.
// ... existing code ...

   // Error handling middleware
   app.use((err, req, res, next) => {
       console.error(err.stack);
       res.status(500).send({ error: 'Something went wrong!' });
   });

   // Start the server
   app.listen(port, () => {
       console.log(`Server is running on port ${port}`);
   });
9. Use Environment Variables
Using environment variables helps manage configuration settings securely.
npm install dotenv PORT=3000
MONGODB_URI=mongodb+srv://<username>:<password>@cluster0.mongodb.net/myFirstDatabase?retryWrites=true&w=majority this is your updated app.js
require('dotenv').config();
   const express = require('express');
   const morgan = require('morgan');
   const mongoose = require('mongoose');
   const cors = require('cors');
   const User = require('./models/user');
   const app = express();
   const port = process.env.PORT || 3000;

   console.log('Starting the server...');

   mongoose.connect(process.env.MONGODB_URI, { useNewUrlParser: true, useUnifiedTopology: true })
       .then(() => console.log('Connected to MongoDB'))
       .catch(err => console.error('Could not connect to MongoDB', err));

   // Middleware to parse JSON bodies
   app.use(express.json());

   // Use morgan for logging
   app.use(morgan('tiny'));

   // Use cors for handling CORS issues
   app.use(cors());

   console.log('Middleware set up.');

   // Basic route
   app.get('/', (req, res) => {
       console.log('Received a request on /');
       res.send('Hello World!');
   });

   // CRUD routes
   // ... existing CRUD routes ...

   // Error handling middleware
   app.use((err, req, res, next) => {
       console.error(err.stack);
       res.status(500).send({ error: 'Something went wrong!' });
   });

   console.log('Route set up.');

   // Start the server
   app.listen(port, () => {
       console.log(`Server is running on port ${port}`);
   });
10. Add Basic Authentication
For a more secure API, you might want to add basic authentication. Here’s a simple example using HTTP Basic Auth:
npm install express-basic-auth const basicAuth = require('express-basic-auth');
// ... existing code ...
// Use basic auth for all routes
app.use(basicAuth({
users: { 'admin': 'supersecret' },
challenge: true
}));
// ... existing code ... 11. Document Your API
Using tools like Swagger can help you document your API endpoints.
npm install swagger-ui-express swagger-jsdoc Create a swagger.js file in the root folder, you’ve to add the following code to your file.
const swaggerJsDoc = require('swagger-jsdoc');
const swaggerUi = require('swagger-ui-express');

const swaggerOptions = {
    swaggerDefinition: {
        openapi: '3.0.0',
        info: {
            title: 'User API',
            version: '1.0.0',
            description: 'A simple Express User API'
        },
        servers: [
            {
                url: '<http://localhost:3000>'
            }
        ]
    },
    apis: ['./app.js'] // Path to the API docs
};

const swaggerDocs = swaggerJsDoc(swaggerOptions);

module.exports = (app) => {
    app.use('/api-docs', swaggerUi.serve, swaggerUi.setup(swaggerDocs));
};
Add the following code to your app.js file to set up Swagger:
update your app.js file
require('dotenv').config();
const express = require('express');
const morgan = require('morgan');
const mongoose = require('mongoose');
const cors = require('cors');
const User = require('./models/user');
const setupSwagger = require('./swagger'); // Import the Swagger setup function
const app = express();
const port = process.env.PORT || 3000;

console.log('Starting the server...');

mongoose.connect(process.env.MONGODB_URI, { useNewUrlParser: true, useUnifiedTopology: true })
    .then(() => console.log('Connected to MongoDB'))
    .catch(err => console.error('Could not connect to MongoDB', err));

// Middleware to parse JSON bodies
app.use(express.json());

// Use morgan for logging
app.use(morgan('tiny'));

// Use cors for handling CORS issues
app.use(cors());

console.log('Middleware set up.');

// Basic route
app.get('/', (req, res) => {
    console.log('Received a request on /');
    res.send('Hello World!');
});

// CRUD routes
// ... existing CRUD routes ...

// Setup Swagger
setupSwagger(app);

// Error handling middleware
app.use((err, req, res, next) => {
    console.error(err.stack);
    res.status(500).send({ error: 'Something went wrong!' });
});

console.log('Route set up.');

// Start the server
app.listen(port, () => {
    console.log(`Server is running on port ${port}`);
});
Add comments to your routes in app.js to document them with Swagger. Let’s see an example for the GET /users route:
/**
 * @swagger
 * /users:
 *   get:
 *     summary: Retrieve a list of users
 *     responses:
 *       200:
 *         description: A list of users
 *         content:
 *           application/json:
 *             schema:
 *               type: array
 *               items:
 *                 type: object
 */
app.get('/users', async (req, res) => {
    try {
        const users = await User.find();
        res.send(users);
    } catch (error) {
        res.status(500).send(error);
    }
});

/**
 * @swagger
 * /users/{id}:
 *   get:
 *     summary: Retrieve a single user by ID
 *     parameters:
 *       - in: path
 *         name: id
 *         required: true
 *         schema:
 *           type: string
 *         description: The user ID
 *     responses:
 *       200:
 *         description: A single user
 *         content:
 *           application/json:
 *             schema:
 *               type: object
 *       404:
 *         description: User not found
 */
app.get('/users/:id', async (req, res) => {
    try {
        const user = await User.findById(req.params.id);
        if (!user) {
            return res.status(404).send('User not found');
        }
        res.send(user);
    } catch (error) {
        res.status(500).send(error);
    }
});

// Add similar comments for other routes...
Now, when you go to “http://localhost:3000/api-docs”, use your username and password which is in app.js
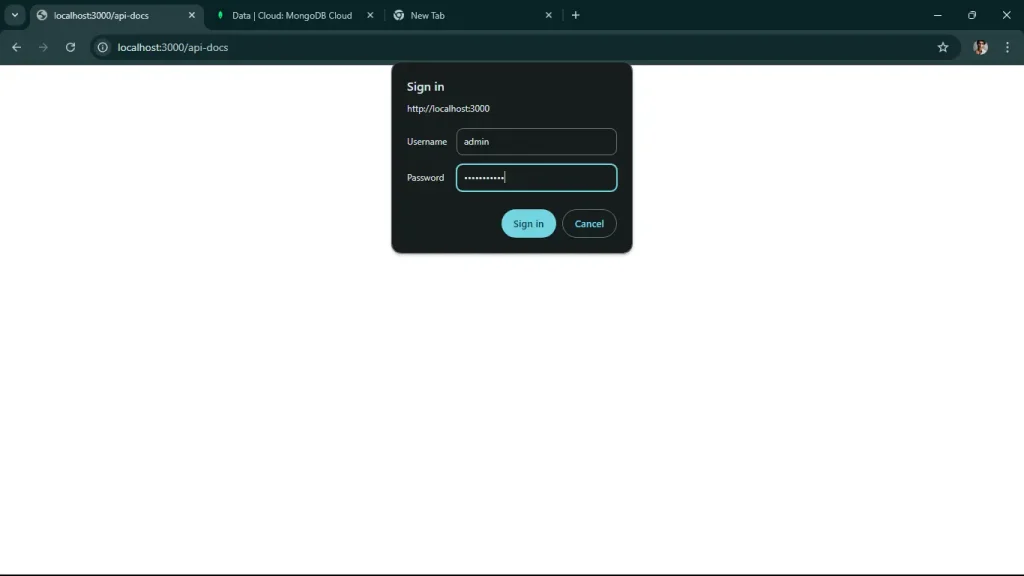
You’ll get this, you should be able to access the Swagger UI and see the documentation for your API.
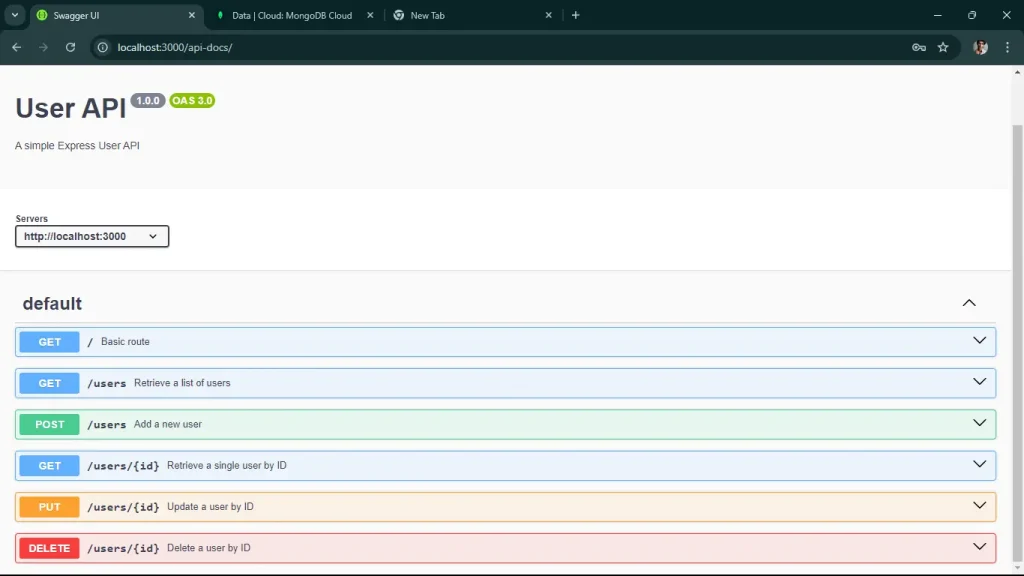
You have successfully built a scalable API with Node.js and Express, complete with CRUD operations, basic authentication, and API documentation using Swagger. You can deploy your API over the cloud which makes it accessible to all people on the internet, you can use services like Heroku for deployment.
Scale Your Business with Custom API Solutions
Discover how we deliver robust APIs with Node.js and Express that grow with your business.
Conclusion
Building scalable APIs with Node.js and Express requires a strategic approach, including modular architecture, optimized performance with non-blocking I/O, clustering, efficient database management, and robust security measures. By implementing caching, monitoring tools, and auto-scaling, your API can handle thousands of requests per second, ensuring reliability and performance under heavy loads.
Ready to scale your API with Node.js and Express? Contact us today to build a future-proof API solution for your business needs!
Frequently Asked Questions
Node.js offers several advantages for API development, including its asynchronous, non-blocking architecture that allows for the simultaneous handling of multiple requests. This leads to improved performance and scalability. Additionally, Node.js uses JavaScript, enabling developers to work across both the client and server sides, streamlining the development process.
Express.js is a minimal and flexible web application framework that simplifies the process of building APIs with Node.js. It provides robust routing, middleware support, and easy integration with various databases, making it an excellent choice for developing RESTful APIs quickly and efficiently.
To ensure your API is scalable, consider implementing a microservices architecture, which allows different components to be scaled independently. Additionally, optimize your code for performance, use caching strategies, and conduct regular load testing to identify and address potential bottlenecks.
Best practices for error handling in Node.js APIs include using middleware to catch errors globally, logging errors for monitoring and debugging, and providing meaningful error messages to clients. It’s also essential to handle different types of errors (e.g., validation errors, database errors) appropriately to enhance user experience.
ViitorCloud offers comprehensive development services tailored to your business needs, specializing in building scalable APIs using Node.js and Express. Our team of experienced developers utilizes best practices in API design and architecture, ensuring that your application can handle high loads efficiently. With a focus on performance optimization and a robust development process, ViitorCloud can help you create APIs that not only meet current demands but also adapt to future growth, providing a strong foundation for your digital solutions.

Vishal Patel
Vishal Patel is an experienced Solution Consultant with a proven track record in the information technology and services industry.